---
title: "How to Setup Jenkins on AWS Using CloudFormation"
description: "We will be using CloudFormation to setup Jenkins on AWS. CloudFormation is a service that helps you model and set up your AWS resources so that you can spend less time managing those resources and more time focusing on your applications that run in AWS."
author: "Mohammad Abu Mattar"
canonical: https://mkabumattar.com/blog/post/how-to-setup-jenkins-on-aws-using-cloudformation
---
# How to Setup Jenkins on AWS Using CloudFormation
## Introduction
In a previous blog post, we setup Jenkins on AWS using the AWS CLI ([How to Install Jenkins on AWS EC2 Instance](/blog/post/how-to-install-jenkins-on-aws-ec2-instance)). In this blog post, we will be using CloudFormation to setup Jenkins on AWS. CloudFormation is a service that helps you model and set up your AWS resources so that you can spend less time managing those resources and more time focusing on your applications that run on AWS.
## Prerequisites
- AWS CLI installed and configured
- IAM user with the following permissions:
- AmazonVPCFullAccess
- AmazonEC2FullAccess
- AmazonS3FullAccess
## Create a CloudFormation
### Step 1: Create a Key Pair
Create a key pair to access the EC2 instance via SSH.
```shell
# Create a key pair
aws ec2 create-key-pair \
--key-name jenkins-server-key-pair \
--query 'KeyMaterial' \
--output text > jenkins-server-key-pair.pem
# Change the permission of the key pair
chmod 400 jenkins-server-key-pair.pem
```
Store the key pair at a safe place. You will need it to access the EC2
instance via SSH.
### Step 2: Create a CloudFormation Template
Create a file named `jenkins-server.yml` and add the following content:
```shell
touch jenkins-server.yml
```
```yaml title="jenkins-server.yml"
AWSTemplateFormatVersion: 2010-09-09
Description: >-
This template creates a VPC with a public subnet and an EC2 instance with
Jenkins installed. The EC2 instance is accessible via SSH and HTTP.
Parameters:
VPCCidrBlock:
Description: CIDR block for the VPC
Type: String
Default: 15.0.0.0/16
AllowedPattern: (\d{1,3})\.(\d{1,3})\.(\d{1,3})\.(\d{1,3})/(\d{1,2})
ConstraintDescription: must be a valid IP CIDR range of the form x.x.x.x/x.
VPCName:
Description: Name of the VPC
Type: String
Default: jenkins-server-vpc
AllowedPattern: ^[a-zA-Z0-9-]*$
ConstraintDescription: must be a valid VPC name.
PublicSubnetCidrBlock:
Description: CIDR block for the public subnet
Type: String
Default: 15.0.1.0/24
AllowedPattern: (\d{1,3})\.(\d{1,3})\.(\d{1,3})\.(\d{1,3})/(\d{1,2})
ConstraintDescription: must be a valid IP CIDR range of the form x.x.x.x/x.
PublicSubnetAvailabilityZone:
Description: Availability zone for the public subnet
Type: String
Default: us-east-1a
PublicSubnetName:
Description: Name of the public subnet
Type: String
Default: jenkins-server-public-subnet
AllowedPattern: ^[a-zA-Z0-9-]*$
ConstraintDescription: must be a valid subnet name.
InternetGatewayName:
Description: Name of the internet gateway
Type: String
Default: jenkins-server-internet-gateway
AllowedPattern: ^[a-zA-Z0-9-]*$
ConstraintDescription: must be a valid internet gateway name.
PublicRouteTableName:
Description: Name of the public route table
Type: String
Default: jenkins-server-public-route-table
AllowedPattern: ^[a-zA-Z0-9-]*$
ConstraintDescription: must be a valid route table name.
SecurityGroupName:
Description: Name of the security group
Type: String
Default: jenkins-server-security-group
AllowedPattern: ^[a-zA-Z0-9-]*$
ConstraintDescription: must be a valid security group name.
KeyPairName:
Description: Name of an existing EC2 KeyPair to enable SSH access to the instances
Type: AWS::EC2::KeyPair::KeyName
Default: jenkins-server-key-pair
ConstraintDescription: must be the name of an existing EC2 KeyPair.
InstanceImageId:
Description: Image ID of the instance
Type: String
Default: ami-0b0dcb5067f052a63
AllowedPattern: ami-[a-z0-9]*
ConstraintDescription: must be a valid AMI ID.
InstanceType:
Description: Enter the instance type for the instance
Type: String
Default: t2.micro
AllowedValues:
- t1.micro
- t2.nano
- t2.micro
- t2.small
- t2.medium
- t2.large
- m1.small
- m1.medium
- m1.large
- m1.xlarge
- m2.xlarge
- m2.2xlarge
- m2.4xlarge
- m3.medium
- m3.large
- m3.xlarge
- m3.2xlarge
- m4.large
- m4.xlarge
- m4.2xlarge
- m4.4xlarge
- m4.10xlarge
- c1.medium
- c1.xlarge
- c3.large
- c3.xlarge
- c3.2xlarge
- c3.4xlarge
- c3.8xlarge
- c4.large
- c4.xlarge
- c4.2xlarge
- c4.4xlarge
- c4.8xlarge
- g2.2xlarge
- g2.8xlarge
- r3.large
- r3.xlarge
- r3.2xlarge
- r3.4xlarge
- r3.8xlarge
- i2.xlarge
- i2.2xlarge
- i2.4xlarge
- i2.8xlarge
- d2.xlarge
- d2.2xlarge
- d2.4xlarge
- d2.8xlarge
- hi1.4xlarge
- hs1.8xlarge
- cr1.8xlarge
- cc2.8xlarge
- cg1.4xlarge
ConstraintDescription: must be a valid EC2 instance type.
InstanceName:
Description: Name of the instance
Type: String
Default: jenkins-server-instance
AllowedPattern: ^[a-zA-Z0-9-]*$
ConstraintDescription: must be a valid instance name.
ElasticIPAddressName:
Description: Name of the elastic IP address
Type: String
Default: jenkins-server-elastic-ip
AllowedPattern: ^[a-zA-Z0-9-]*$
ConstraintDescription: must be a valid elastic IP address name.
Resources:
VPC:
Type: AWS::EC2::VPC
Properties:
CidrBlock: !Ref VPCCidrBlock
EnableDnsSupport: true
EnableDnsHostnames: true
Tags:
- Key: Name
Value: !Ref VPCName
PublicSubnet:
Type: AWS::EC2::Subnet
Properties:
VpcId: !Ref VPC
CidrBlock: !Ref PublicSubnetCidrBlock
AvailabilityZone: !Ref PublicSubnetAvailabilityZone
MapPublicIpOnLaunch: true
Tags:
- Key: Name
Value: !Ref PublicSubnetName
InternetGateway:
Type: AWS::EC2::InternetGateway
Properties:
Tags:
- Key: Name
Value: !Ref InternetGatewayName
InternetGatewayAttachment:
Type: AWS::EC2::VPCGatewayAttachment
Properties:
VpcId: !Ref VPC
InternetGatewayId: !Ref InternetGateway
PublicRouteTable:
Type: AWS::EC2::RouteTable
Properties:
VpcId: !Ref VPC
Tags:
- Key: Name
Value: !Ref PublicRouteTableName
PublicRoute:
Type: AWS::EC2::Route
DependsOn: InternetGatewayAttachment
Properties:
RouteTableId: !Ref PublicRouteTable
DestinationCidrBlock: 0.0.0.0/0
GatewayId: !Ref InternetGateway
PublicSubnetRouteTableAssociation:
Type: AWS::EC2::SubnetRouteTableAssociation
Properties:
SubnetId: !Ref PublicSubnet
RouteTableId: !Ref PublicRouteTable
SecurityGroup:
Type: AWS::EC2::SecurityGroup
Properties:
GroupDescription: Jenkins
VpcId: !Ref VPC
SecurityGroupIngress:
- IpProtocol: tcp
FromPort: 22
ToPort: 22
CidrIp: 0.0.0.0/0
- IpProtocol: tcp
FromPort: 80
ToPort: 80
CidrIp: 0.0.0.0/0
- IpProtocol: tcp
FromPort: 443
ToPort: 443
CidrIp: 0.0.0.0/0
- IpProtocol: tcp
FromPort: 8080
ToPort: 8080
CidrIp: 0.0.0.0/0
Tags:
- Key: Name
Value: !Ref SecurityGroupName
Instance:
Type: AWS::EC2::Instance
Properties:
ImageId: !Ref InstanceImageId
InstanceType: !Ref InstanceType
KeyName: !Ref KeyPairName
NetworkInterfaces:
- DeviceIndex: 0
SubnetId: !Ref PublicSubnet
GroupSet:
- !Ref SecurityGroup
UserData:
Fn::Base64: !Sub |
#!/bin/bash
sudo yum update -y
sudo wget -O /etc/yum.repos.d/jenkins.repo https://pkg.jenkins.io/redhat-stable/jenkins.repo
sudo rpm --import https://pkg.jenkins.io/redhat-stable/jenkins.io.key
sudo yum upgrade
sudo amazon-linux-extras install java-openjdk11 -y
sudo yum install jenkins -y
sudo systemctl start jenkins
sudo systemctl enable jenkins
sudo yum install git -y
Tags:
- Key: Name
Value: !Ref InstanceName
ElasticIP:
Type: AWS::EC2::EIP
Properties:
Domain: vpc
NetworkBorderGroup: !Ref AWS::Region
Tags:
- Key: Name
Value: !Ref ElasticIPAddressName
ElasticIPAssociation:
Type: AWS::EC2::EIPAssociation
Properties:
InstanceId: !Ref Instance
EIP: !Ref ElasticIP
Mappings:
AWSRegionArch2AMI:
us-east-1:
HVM64: ami-0b69ea66ff7391e80
HVMG2: ami-0b69ea66ff7391e80
us-east-2:
HVM64: ami-0b69ea66ff7391e80
HVMG2: ami-0b69ea66ff7391e80
Outputs:
GetJenkinsDashboard:
Description: URL to use for Jenkins dashboard
Value: !Join
- ''
- - 'http://'
- !GetAtt Instance.PublicDnsName
- ':8080'
GitHubWebhookURL:
Description: URL to use for GitHub webhooks
Value: !Join
- ''
- - 'http://'
- !GetAtt Instance.PublicDnsName
- ':8080/github-webhook/'
```
### Step 3: Create a CloudFormation Stack
Now that you have created a template, you can create a stack using the AWS CLI.
```shell
aws cloudformation create-stack \
--stack-name jenkins-server \
--template-body file://jenkins-server.yml
```
### Step 4: Check the Status of the Stack
You can check the status of the stack using the AWS CLI.
```shell
aws cloudformation describe-stacks \
--stack-name jenkins-server
```
### Step 5: Access the Jenkins Server
You can access the Jenkins server using the public IP address of the instance.
```shell
# Get the public IP address of the Jenkins server instance
AWS_PUBLIC_IP=$(aws ec2 describe-instances \
--filters "Name=tag:Name,Values=jenkins-server-instance" \
--query "Reservations[*].Instances[*].PublicIpAddress" \
--output text)
# Open the Jenkins dashboard in the browser
echo "http://${AWS_PUBLIC_IP}:8080"
```
## Connect to the Jenkins Server, and Setup Jenkins
### Step 1: Connect to the Jenkins Server
Connect to the Jenkins server using SSH.
```shell
# Get the public IP address of the Jenkins server instance
AWS_PUBLIC_IP=$(aws ec2 describe-instances \
--filters "Name=tag:Name,Values=jenkins-server-instance" \
--query "Reservations[*].Instances[*].PublicIpAddress" \
--output text)
# Connect to the Jenkins server instance via SSH
ssh -i jenkins-server-key-pair.pem ec2-user@${AWS_PUBLIC_IP}
```
### Step 6: Configure Jenkins
Connect to EC2 instance using SSH and run the following commands to configure Jenkins.
```shell
sudo cat /var/lib/jenkins/secrets/initialAdminPassword
```
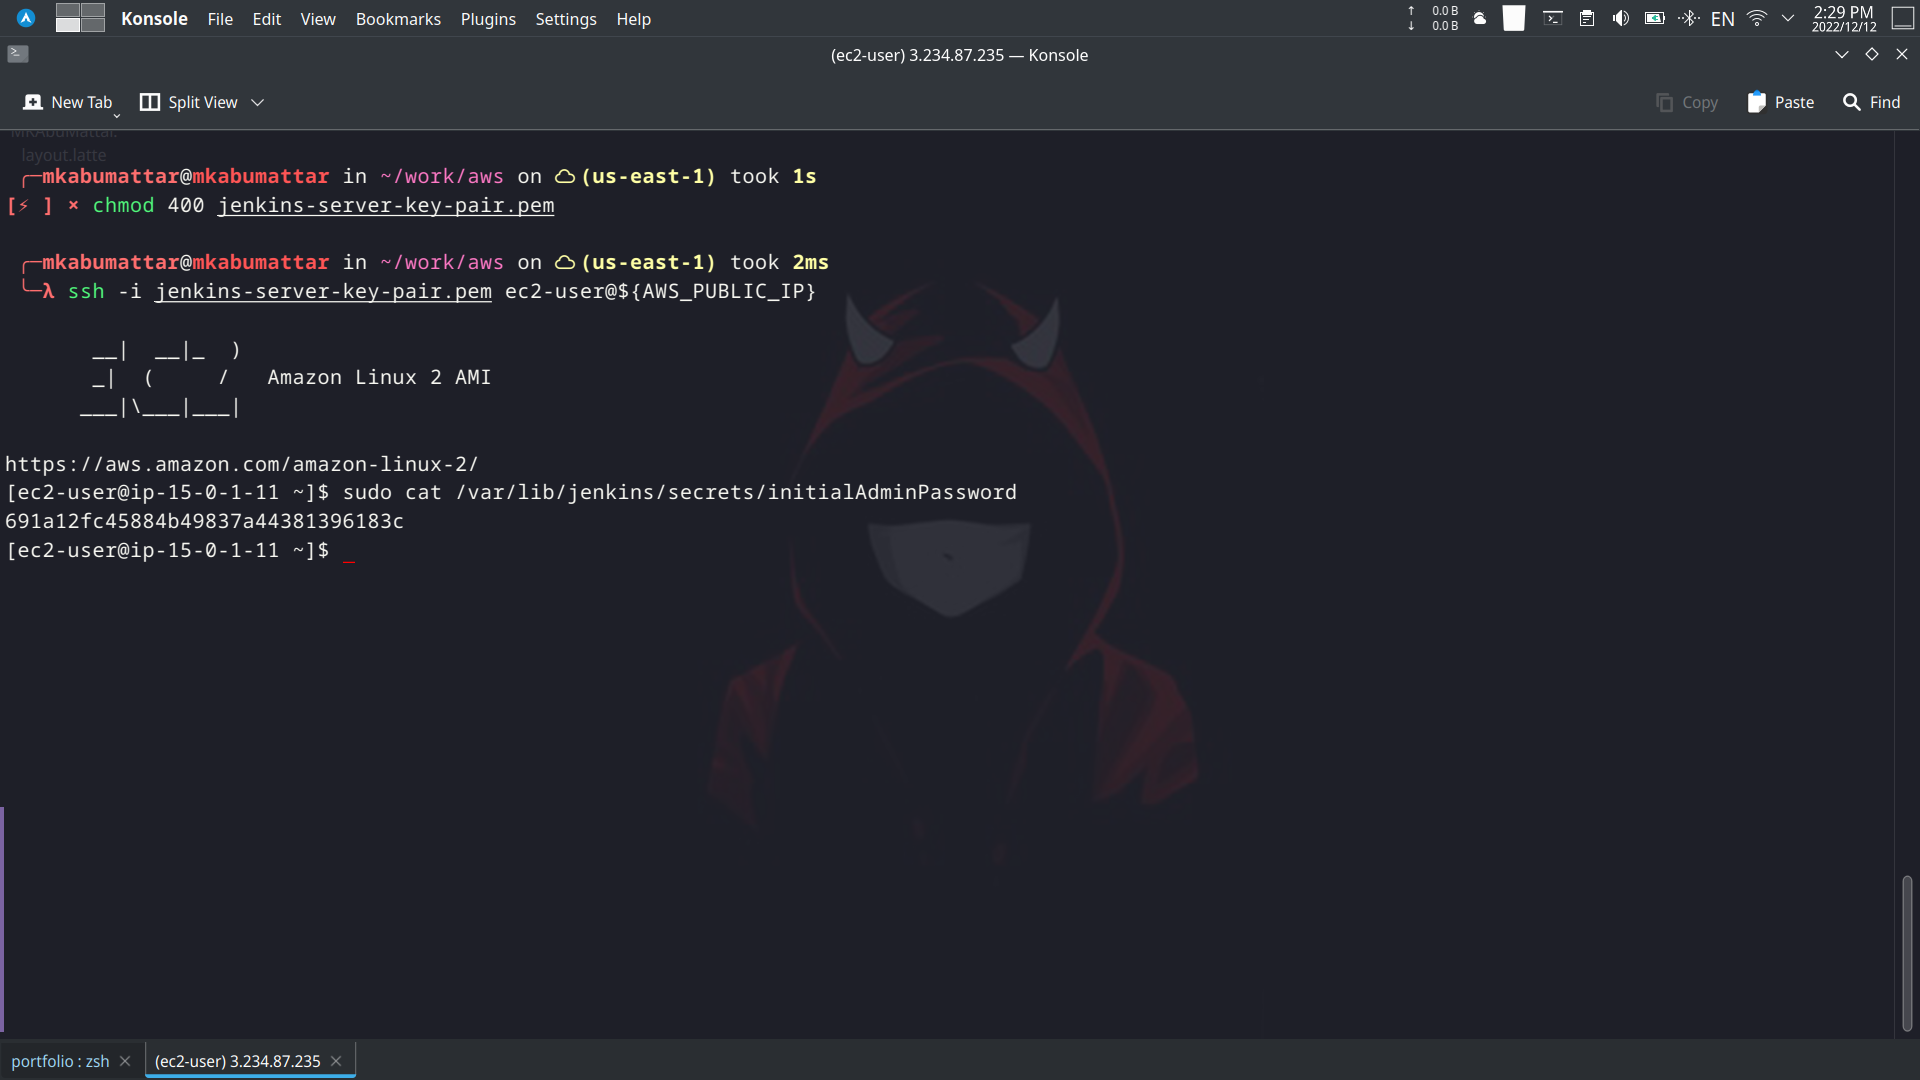
Copy the initial password and paste it in the Jenkins login page.
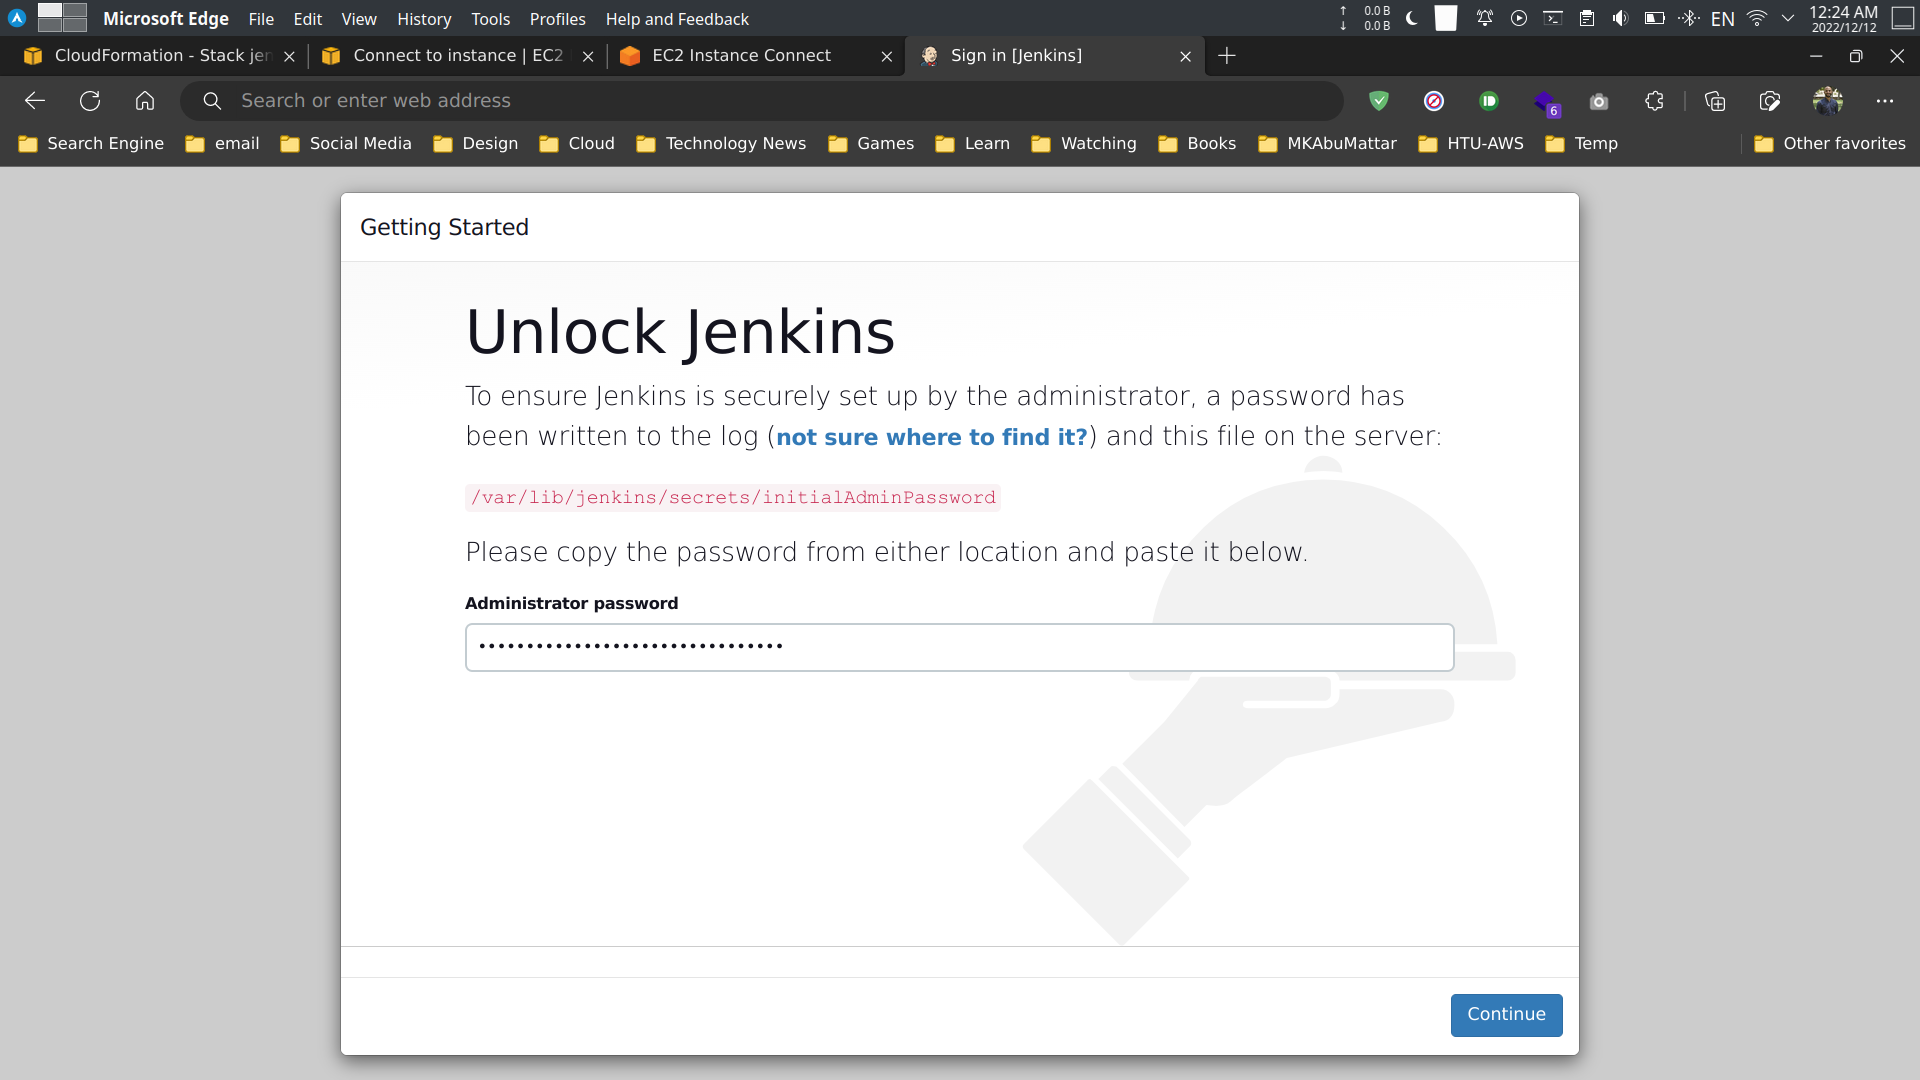
Select the recommended plugins and click on the Install button.
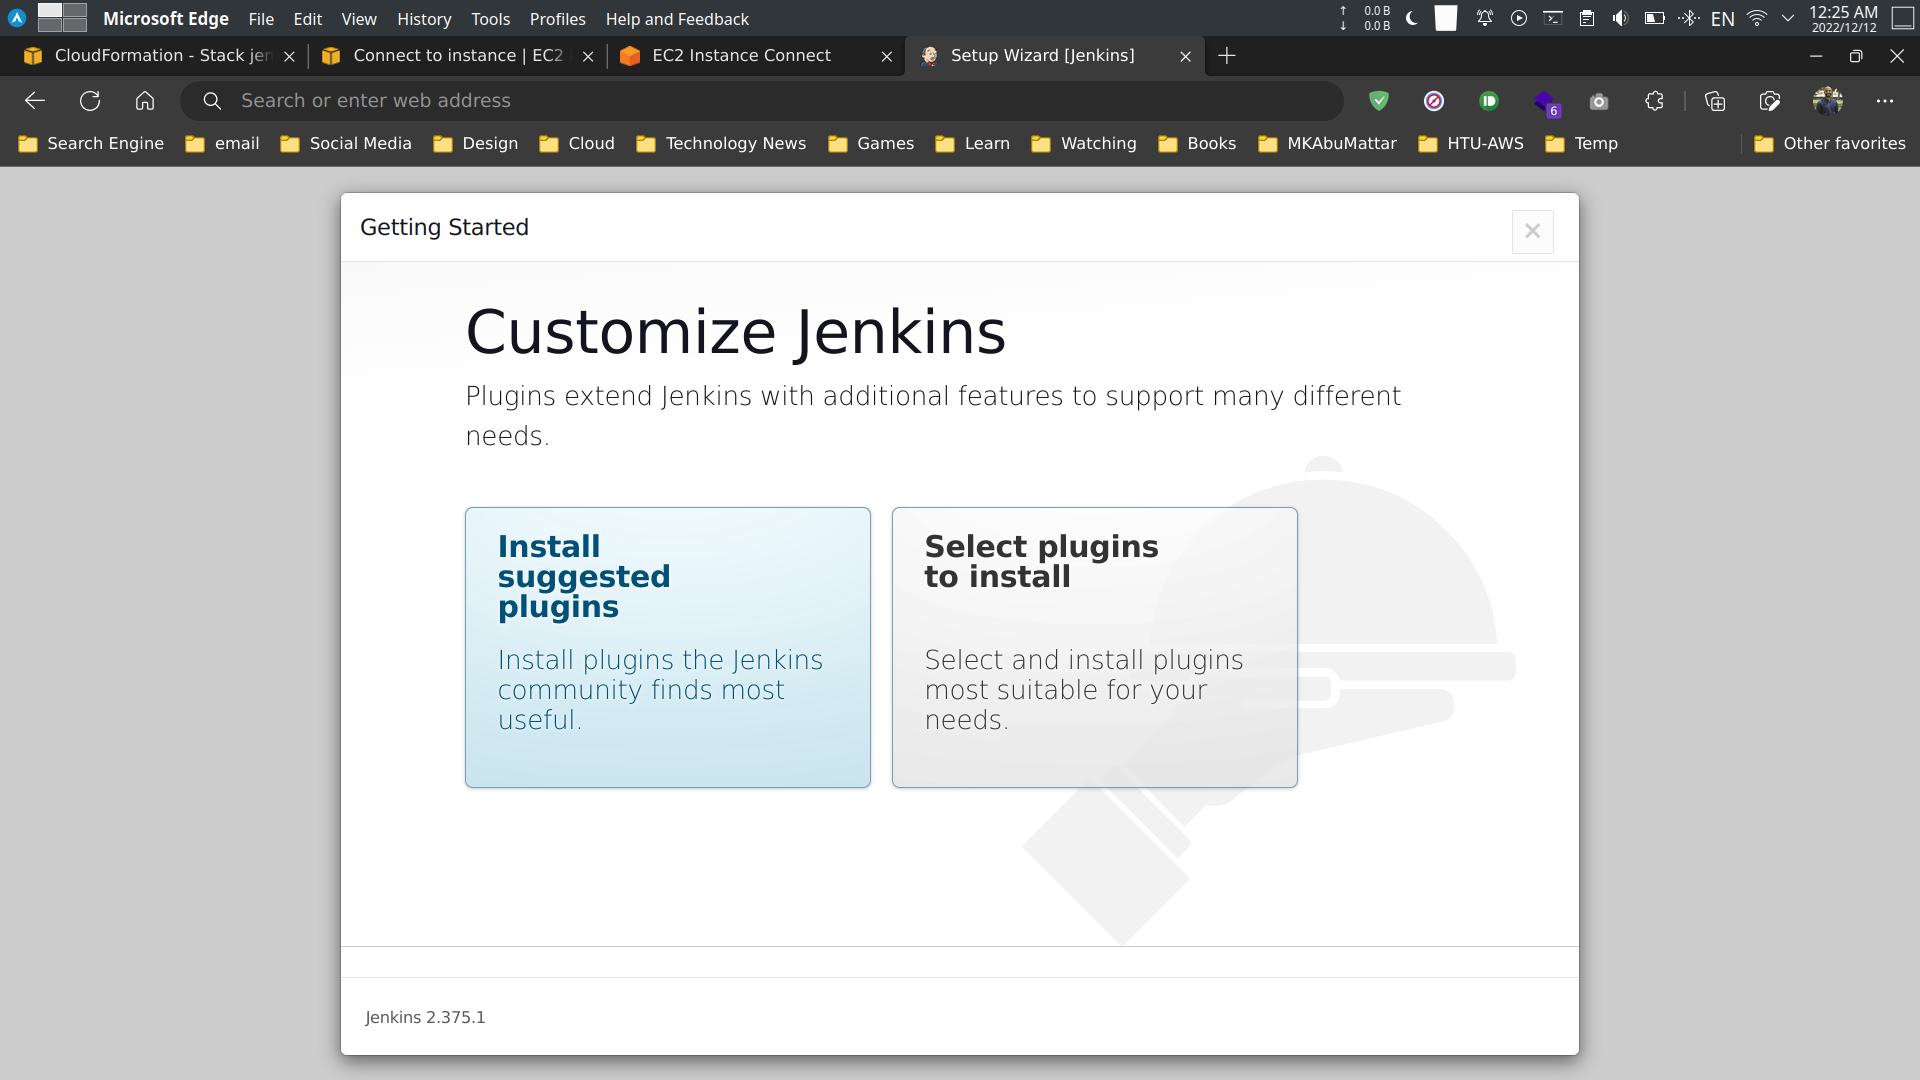
Create an admin user and click on the Save and Finish button.
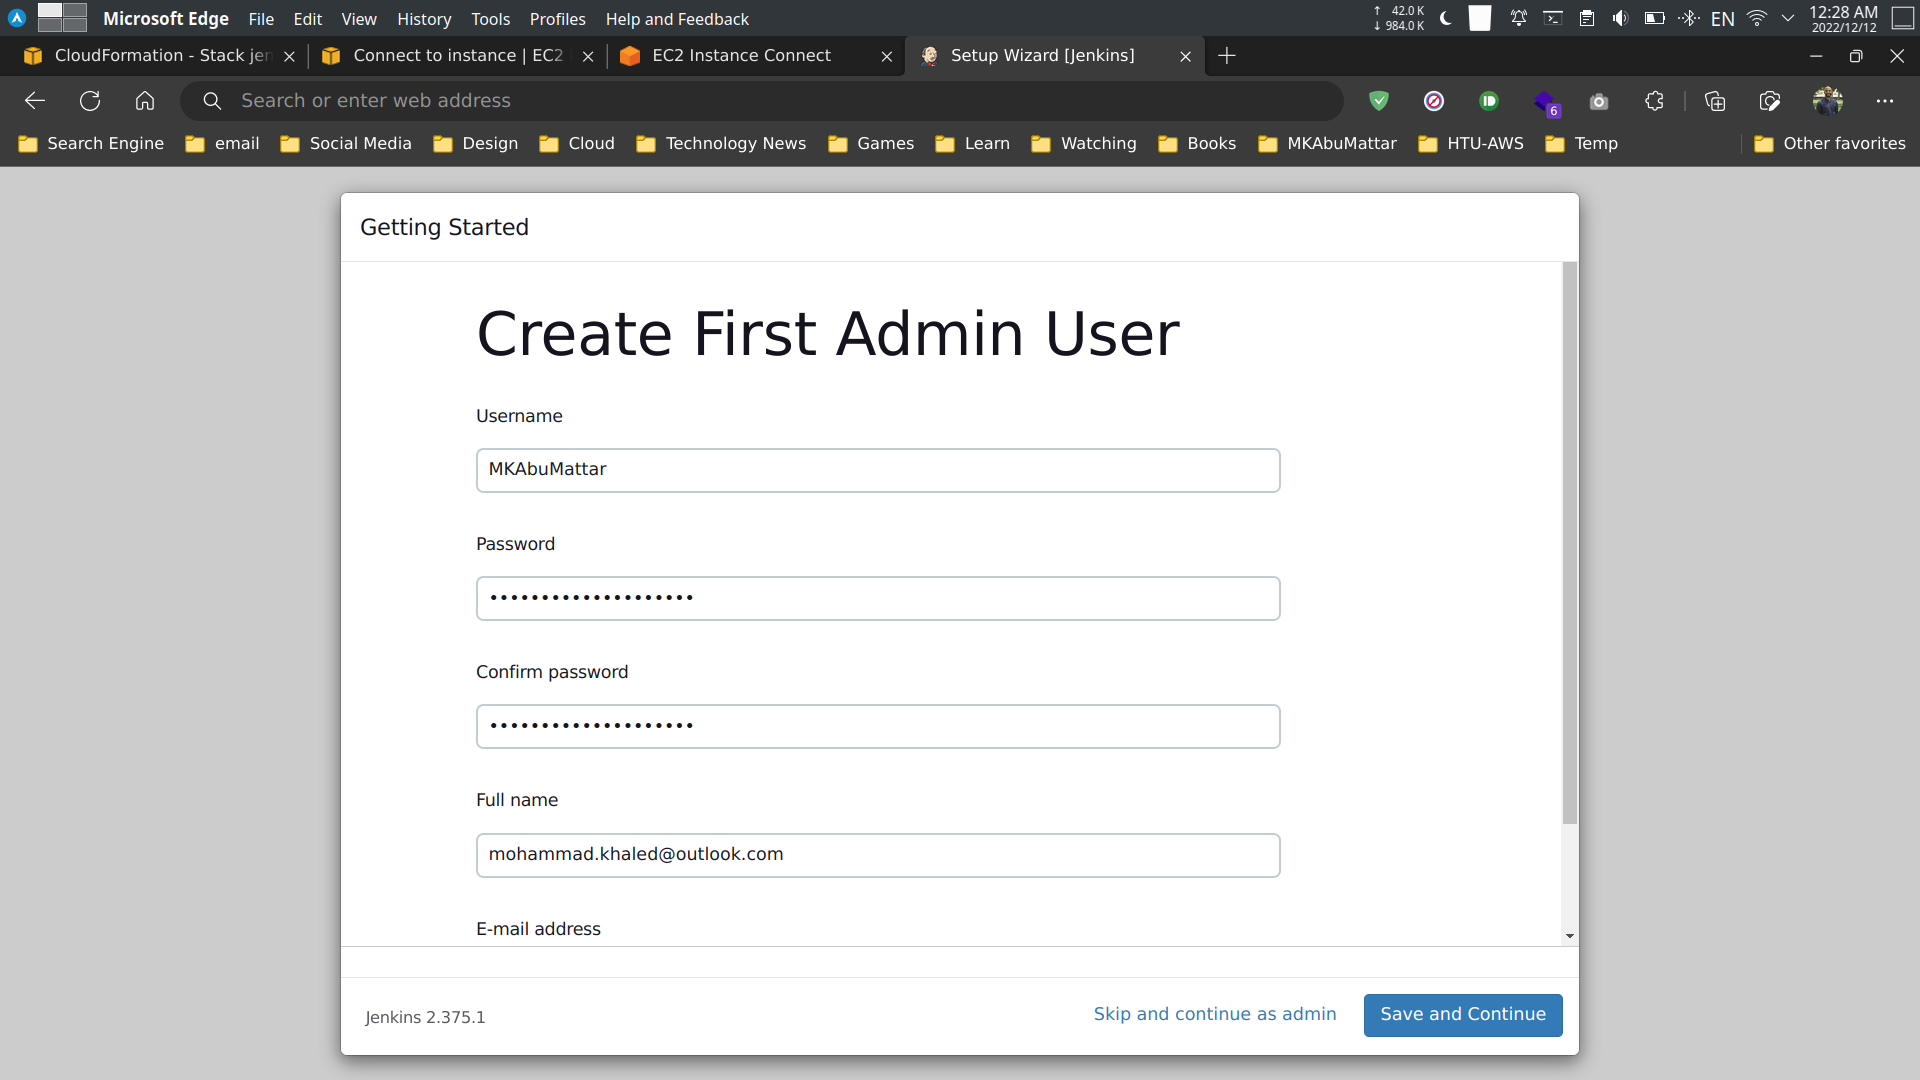
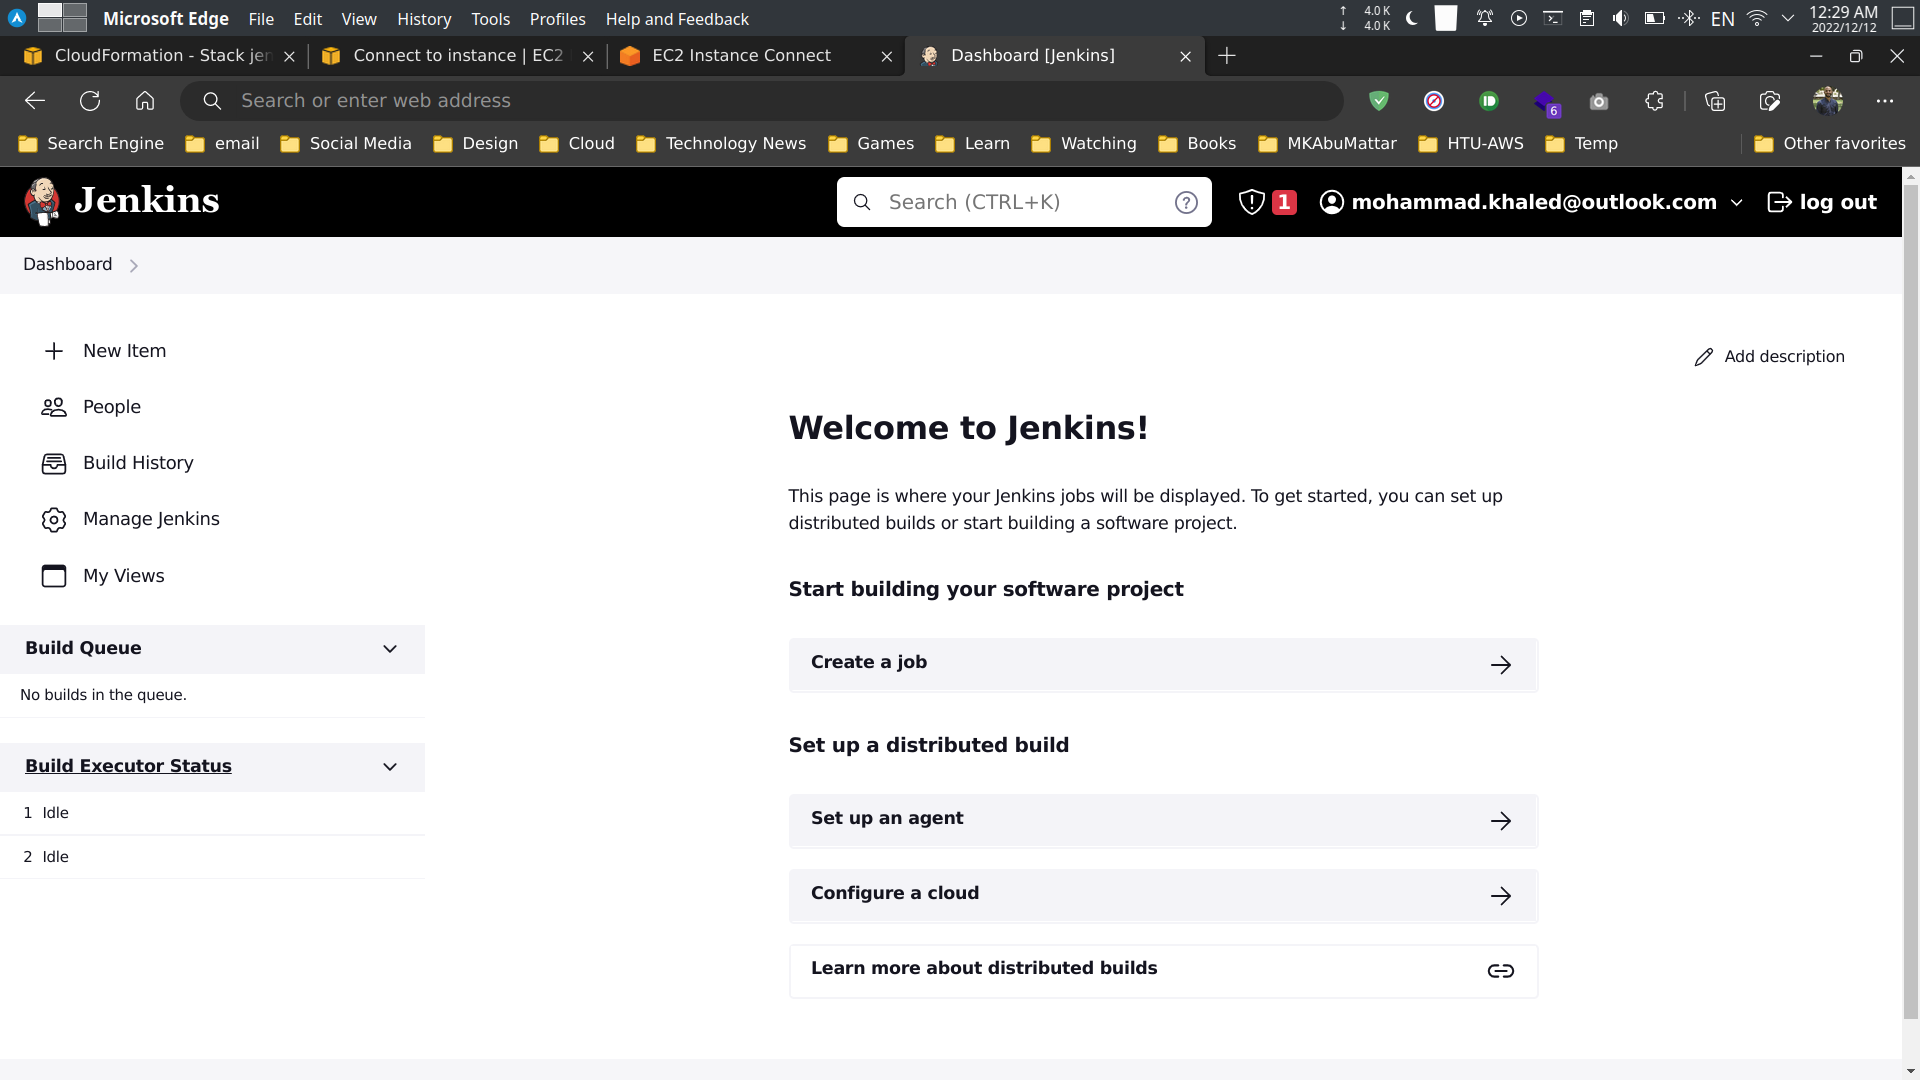
Done! You have successfully setup Jenkins on AWS using CloudFormation.
## Cleanup
You can delete the stack using the AWS CLI.
```shell
# Delete the stack
aws cloudformation delete-stack \
--stack-name jenkins-server
# Check the status of the stack
aws cloudformation describe-stacks \
--stack-name jenkins-server
# Delete the key pair
aws ec2 delete-key-pair \
--key-name jenkins-server-key-pair
```
## Conclusion
In this article, we have learned how to setup Jenkins on AWS using CloudFormation. We have also learned how to create a CloudFormation template and create a stack using the AWS CLI.
## References
- [AWS CloudFormation User Guide](https://docs.aws.amazon.com/AWSCloudFormation/latest/UserGuide/Welcome.html)
- [AWS CloudFormation Template Reference](https://docs.aws.amazon.com/AWSCloudFormation/latest/UserGuide/template-reference.html)
- [Jenkins Official Website](https://www.jenkins.io/)
- [Jenkins User Documentation](https://www.jenkins.io/doc/)
- [Installing Jenkins](https://www.jenkins.io/doc/book/installing/)
- [AWS Command Line Interface (CLI) User Guide](https://docs.aws.amazon.com/cli/latest/userguide/cli-chap-welcome.html)
- [Amazon EC2 User Guide for Linux Instances](https://docs.aws.amazon.com/AWSEC2/latest/UserGuide/concepts.html)
- [Amazon VPC User Guide](https://docs.aws.amazon.com/vpc/latest/userguide/what-is-amazon-vpc.html)
- [AWS Identity and Access Management (IAM) User Guide](https://docs.aws.amazon.com/IAM/latest/UserGuide/introduction.html)
- [AWS Key Pairs and Amazon EC2 Instances](https://docs.aws.amazon.com/AWSEC2/latest/UserGuide/ec2-key-pairs.html)
- [Working with AWS CloudFormation Stacks](https://docs.aws.amazon.com/AWSCloudFormation/latest/UserGuide/stacks.html)
- [User data in CloudFormation](https://docs.aws.amazon.com/AWSCloudFormation/latest/UserGuide/aws-properties-ec2-instance.html#cfn-ec2-instance-userdata)
- [Elastic IP addresses - Amazon EC2](https://docs.aws.amazon.com/AWSEC2/latest/UserGuide/elastic-ip-addresses-eip.html)
- [How to Install Jenkins on AWS EC2 Instance](/blog/how-to-install-jenkins-on-aws-ec2-instance) (Previous related post)
- [AWS CloudFormation Best Practices](https://aws.amazon.com/blogs/devops/aws-cloudformation-best-practices/)